Provision and manage users from Azure AD
Joan uses a System for Cross-Domain Identity Management (SCIM) to enable the automatic provisioning of users from Azure AD (AAD). When enabled, all user management will be done only in Azure AD and disabled on Joan's side.
To establish automatic provisioning of the users please follow the provided instructions below.
Enable SCIM integration in MyJoan
Create a new enterprise application in Azure AD
Create Joan SCIM Azure AD application
More information on the SCIM integration can be found in a Microsoft guide here.
Enable SCIM integration in MyJoan
Navigate to Settings --> Integrations and click on SCIM. Toggle to enable the integration and generate a new token. That token will be used to authenticate the connection between Azure AD and Joan.

Create a new enterprise application in Azure AD
Login to your Azure Portal account and navigate to the Active Directory section.
Continue to the Enterprise applications section to create a new non-gallery application.
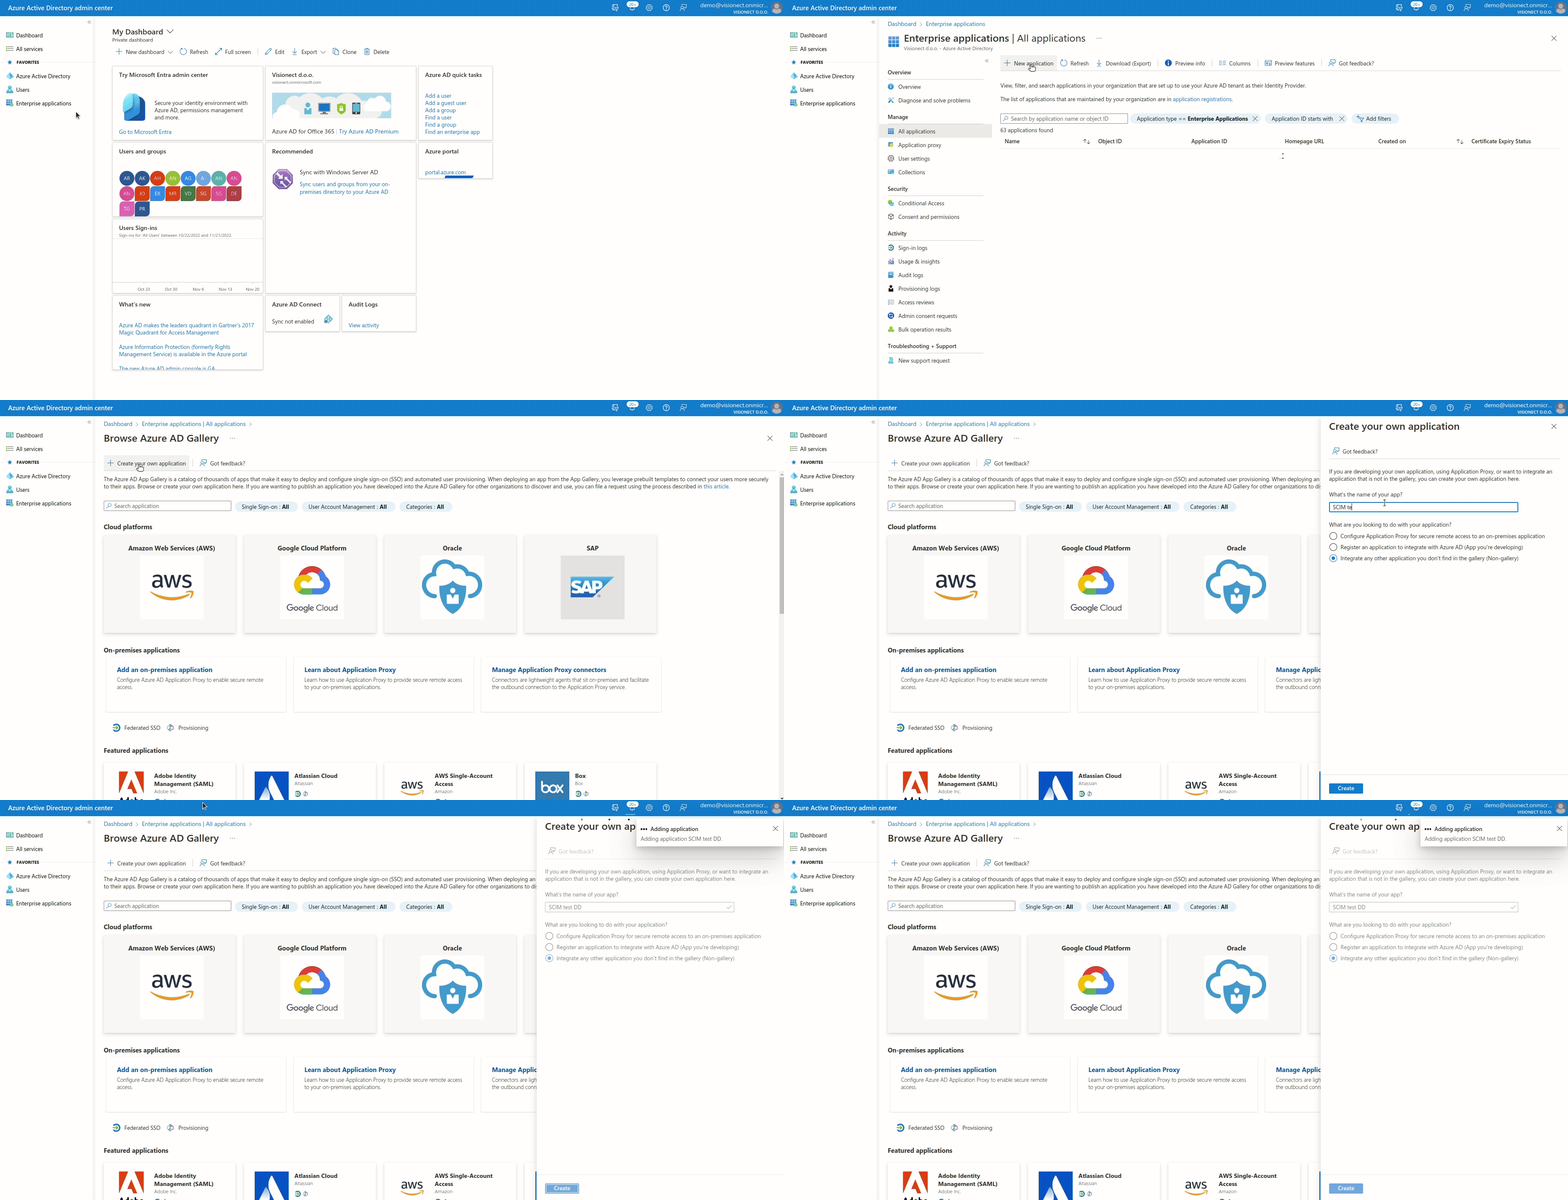
Configure Joan SCIM Azure AD application
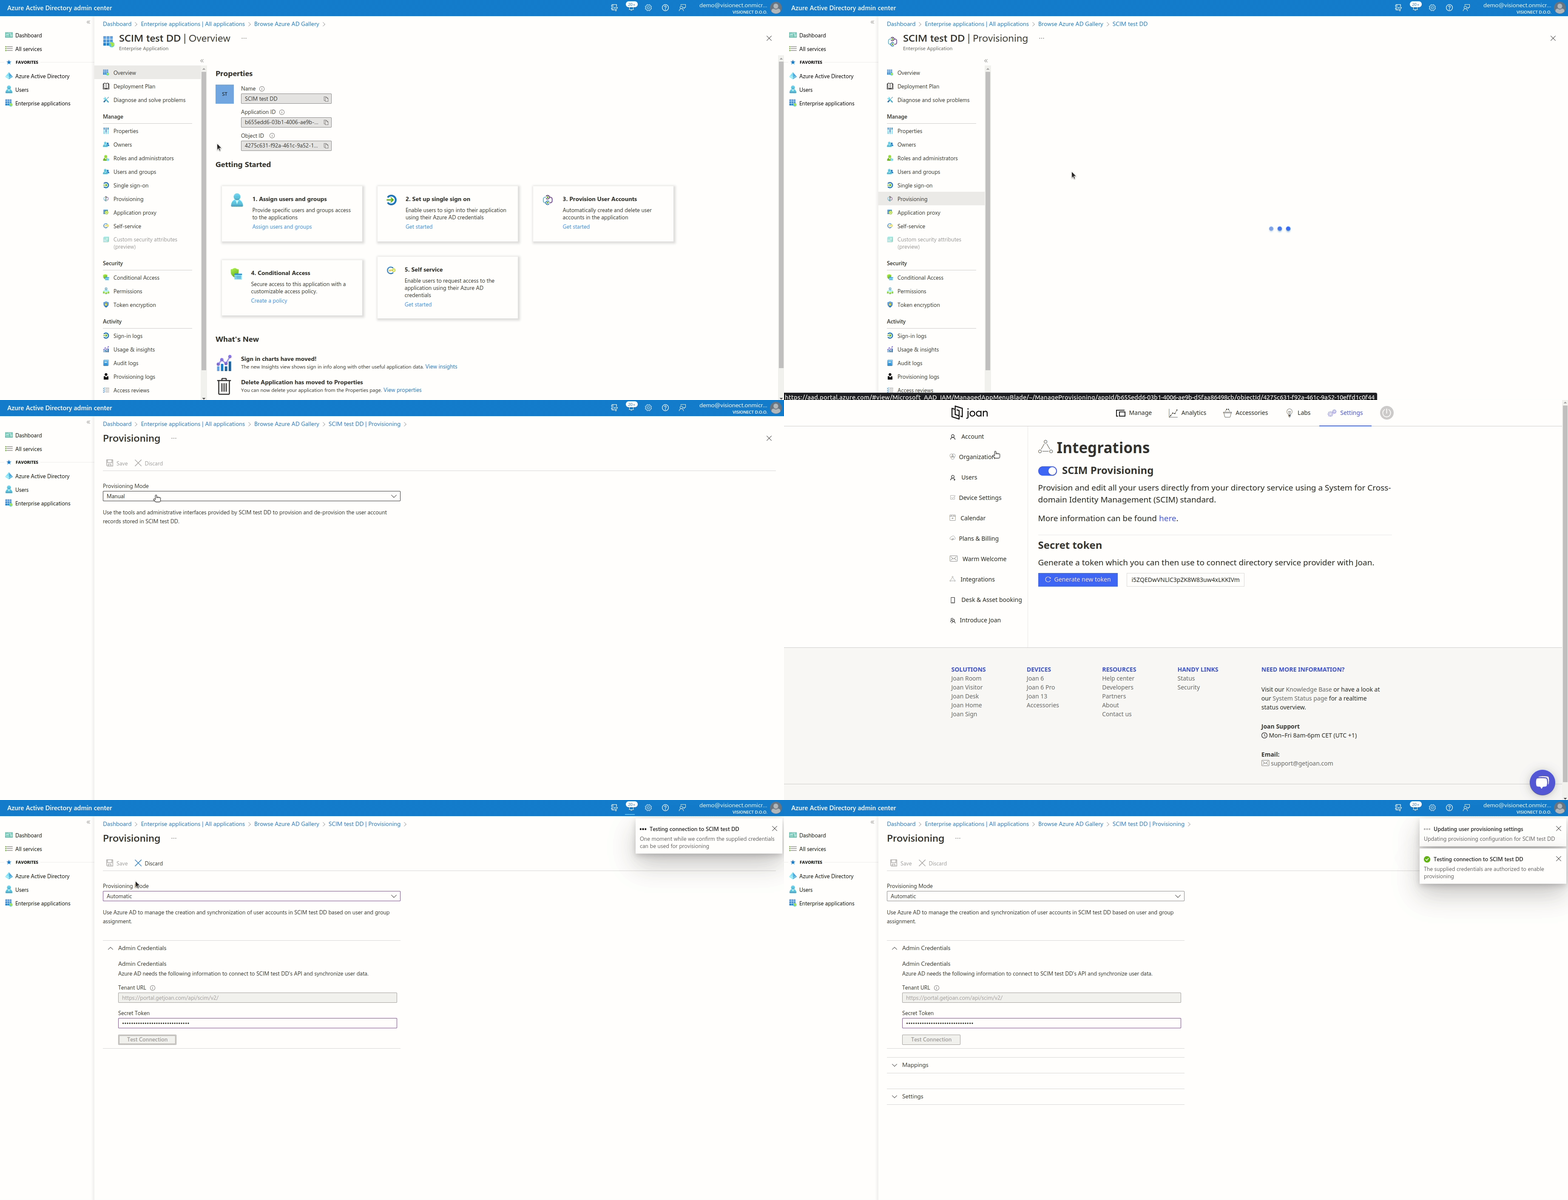
Go to the Provisioning section of the newly created application to connect it to your Joan account.
Make sure to set:
- Provisioning Mode to Automatic
- Tenant URL: https://portal.getjoan.com/api/scim/v2/
- Secret Token: Copied from the Joan SCIM configuration page
Click on Test Connection to confirm that the connection between your Azure AD and Joan is functional. After confirming that the connection works, click Save. Once Save is clicked, additional options will appear below the Admin Credentials option.
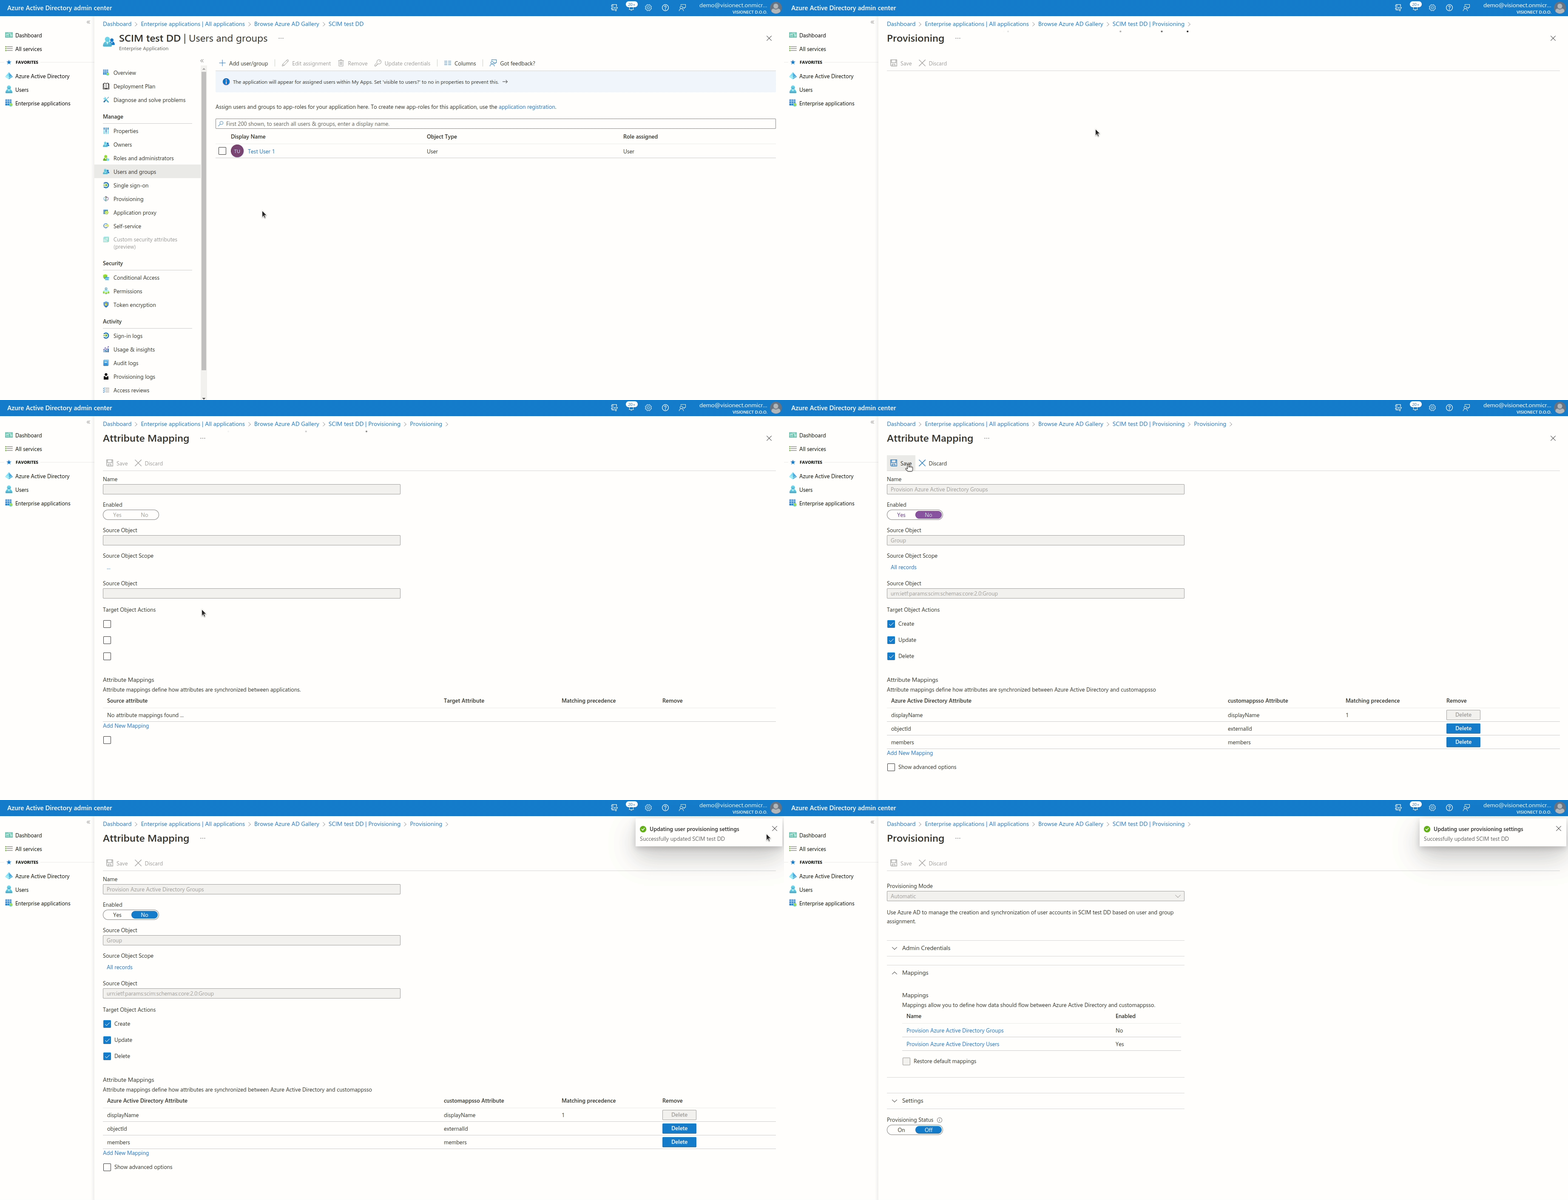
Configure Mapping
Joan supports the mapping of Users, while Group Mapping is currently not available.
To disable the Group Mapping, we will first have to add one active user under the "Users and groups". To do so, please check the step Adding Users and Group
The next step is to map Azure user attributes to Joan ones. Click on "Provision Azure Active Directory Users" and set the attribute mappings as per the table below. Joan supports the following mapping user attributes: Users (Create, Update, Delete).
By default, Azure should already set everything correctly except the objectId -> externalId mapping. In our case, please select objectId instead of the mailNickname.
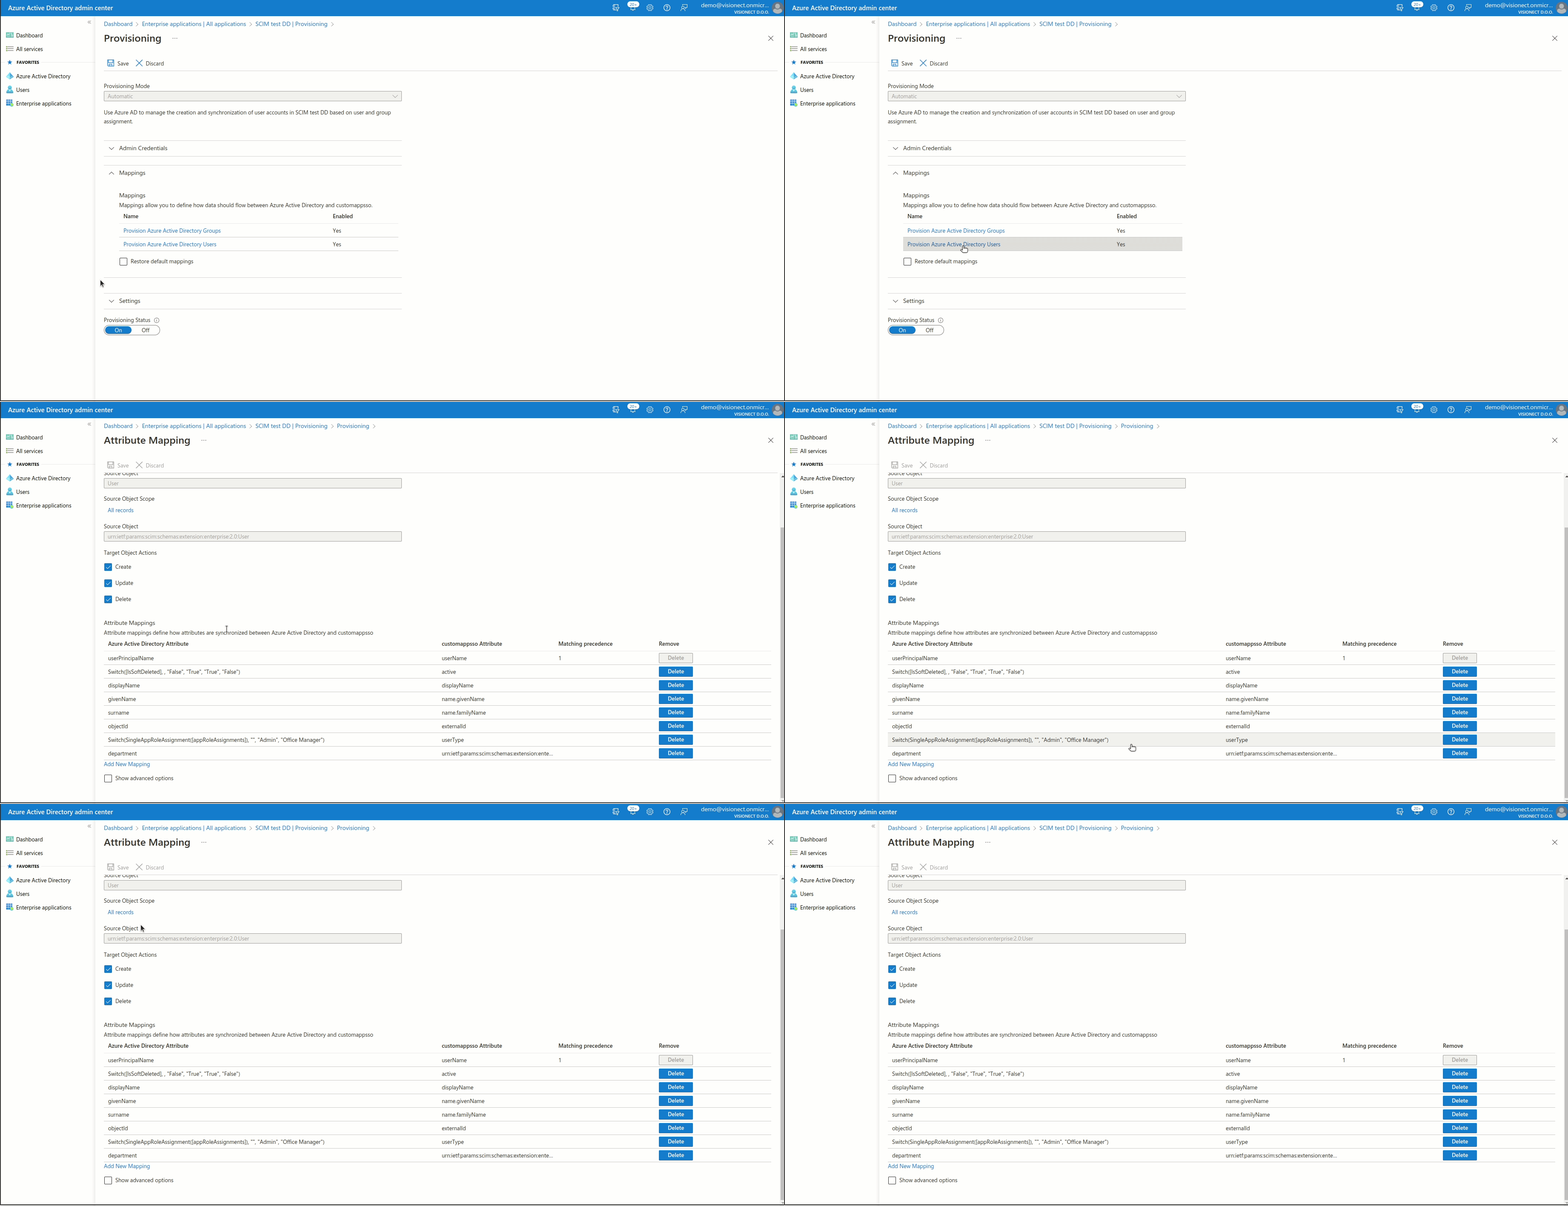
Please also make sure that following mapping is added:
- Click on Add New Mapping
- For Mapping type select Expression
- In Expression field paste -> Switch(SingleAppRoleAssignment([appRoleAssignments]), "", "Admin", "Office Manager")
- For Target attribute select userType
- Click Ok and Save
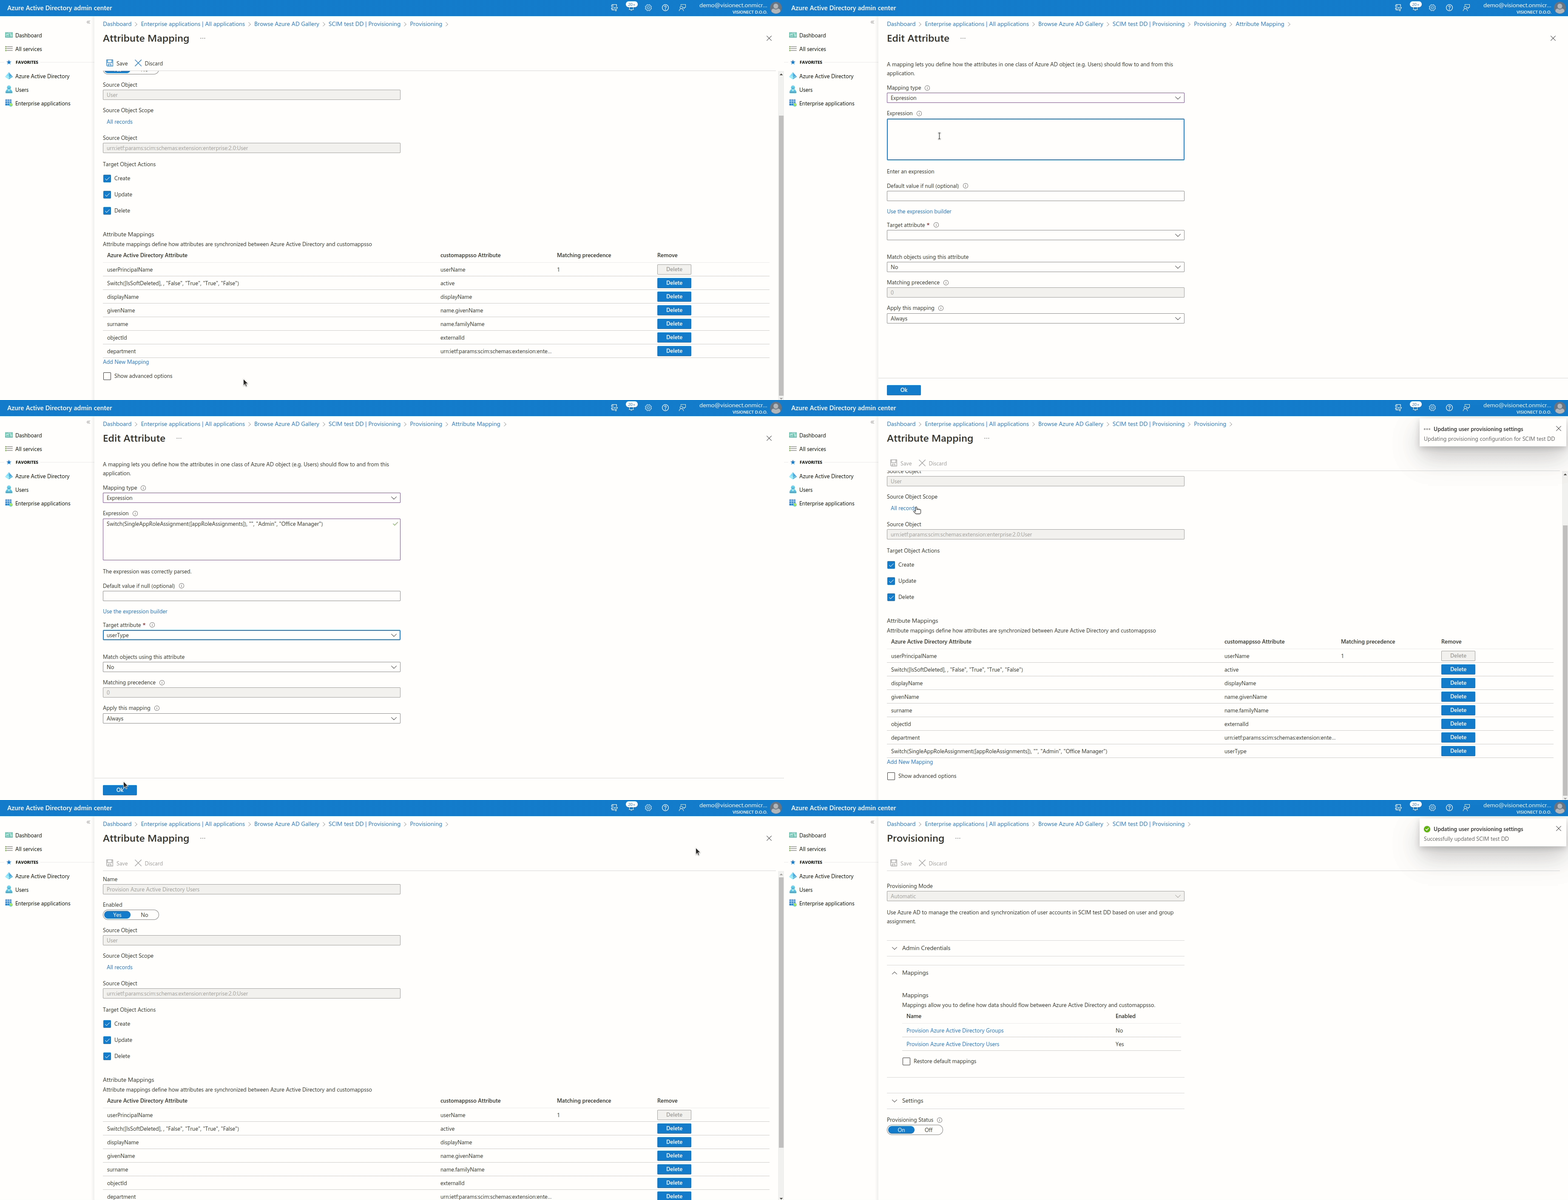
To make sure all of the attributes are set correctly please check the below table:
| Azure attribute | Joan attribute |
Matching |
| userPrincipalName | userName | 1 |
|
Switch([IsSoftDeleted], , "False", "True", "True", "False") |
active | |
| givenName | name.givenName | |
| surname | name.familyName | |
| objectId | externalId | |
| Switch(SingleAppRoleAssignment([appRoleAssignments]), "", "Admin", "Office Manager") | userType | |
| department | urn:ietf:params:scim:schemas:extension:enterprise:2.0:User:department |
Configuring Roles
We currently support two roles - a User and an Office Manager.
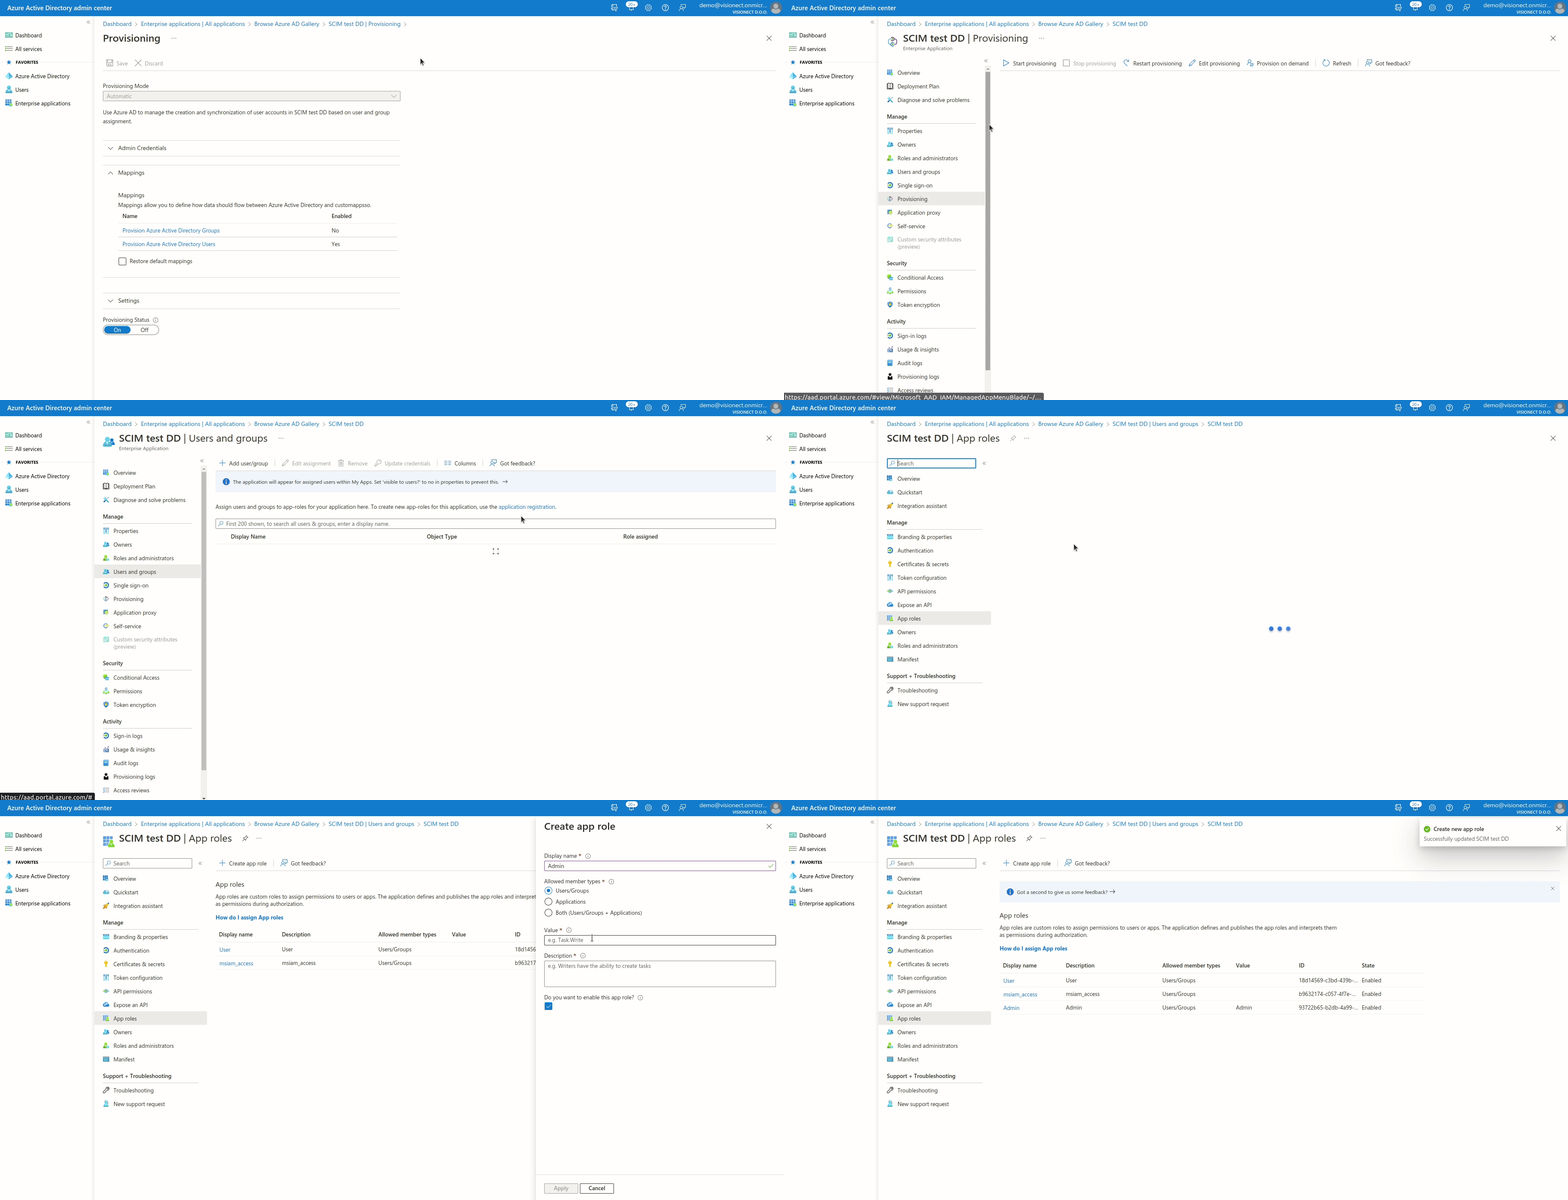
To create the user roles please follow these instructions:
- Please go to App registrations and select the application created for the SCIM integration. NOTE: Don't forget to choose All applications if you can't see your app.
- Click on Create app role
- Make sure to put Admin as the value and as the display name. The description isn't important.
Adding Users and Groups
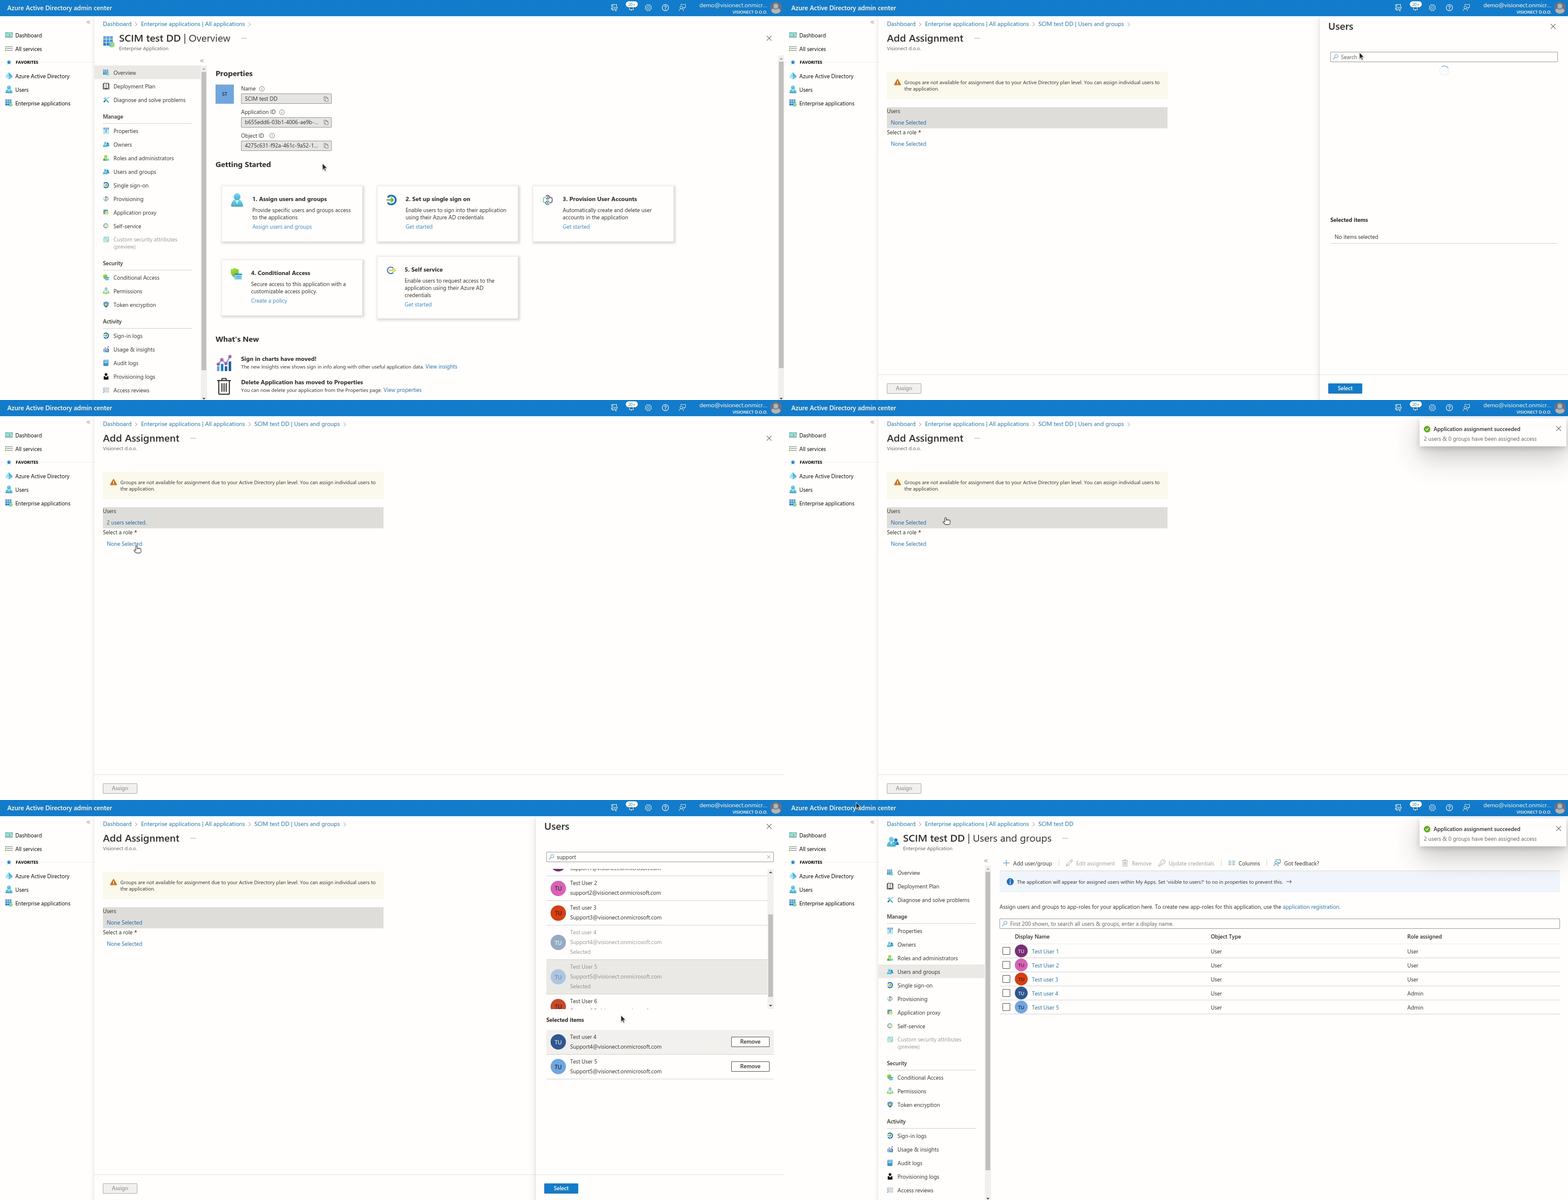
To add the users and groups from your Active Directory to the Joan Application please follow these instructions:
- Find the application that you previously created for Joan
- Go to Users and groups
- Click on +Add users/groups
- Select the Users/Groups you wish to add
- Select the role for the wanted user/group
- Click Assign
Note: When adding users, be careful that you are not provisioning the same account under a specific group or as a user
If the users/groups that you previously added are not syncing, please try to provision them on demand.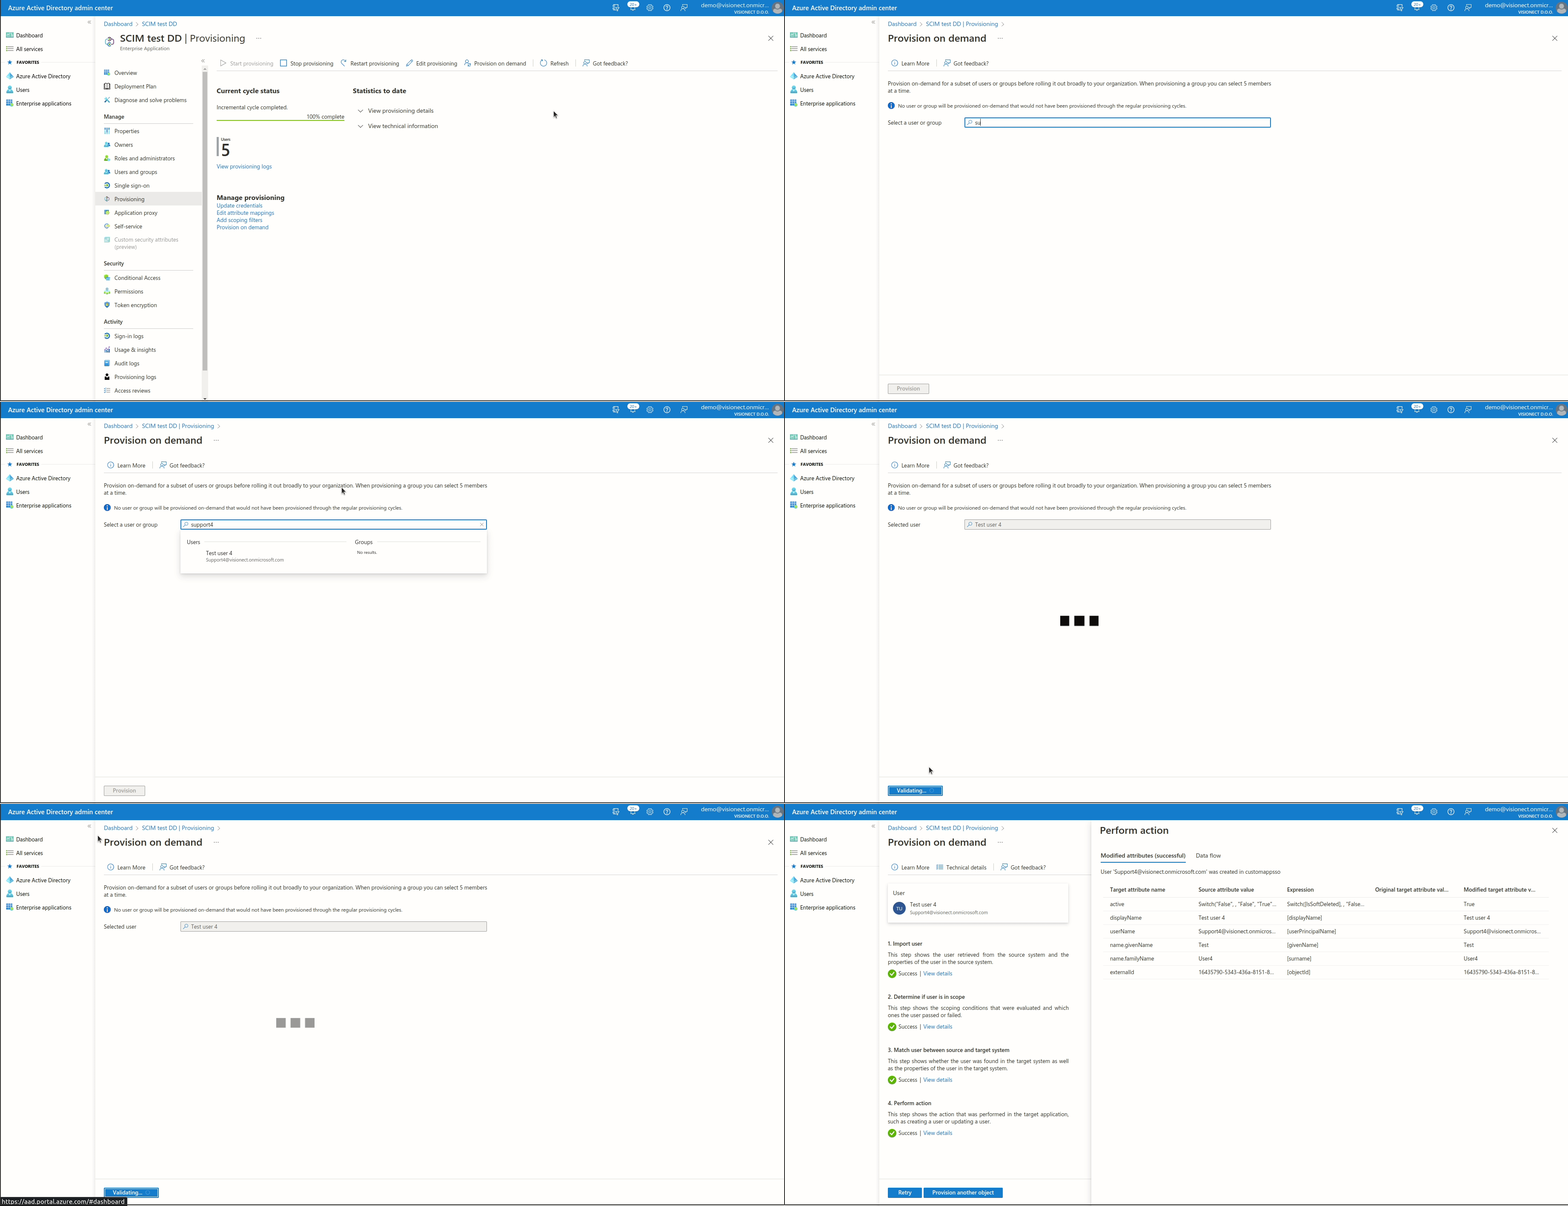
Configuring Departments
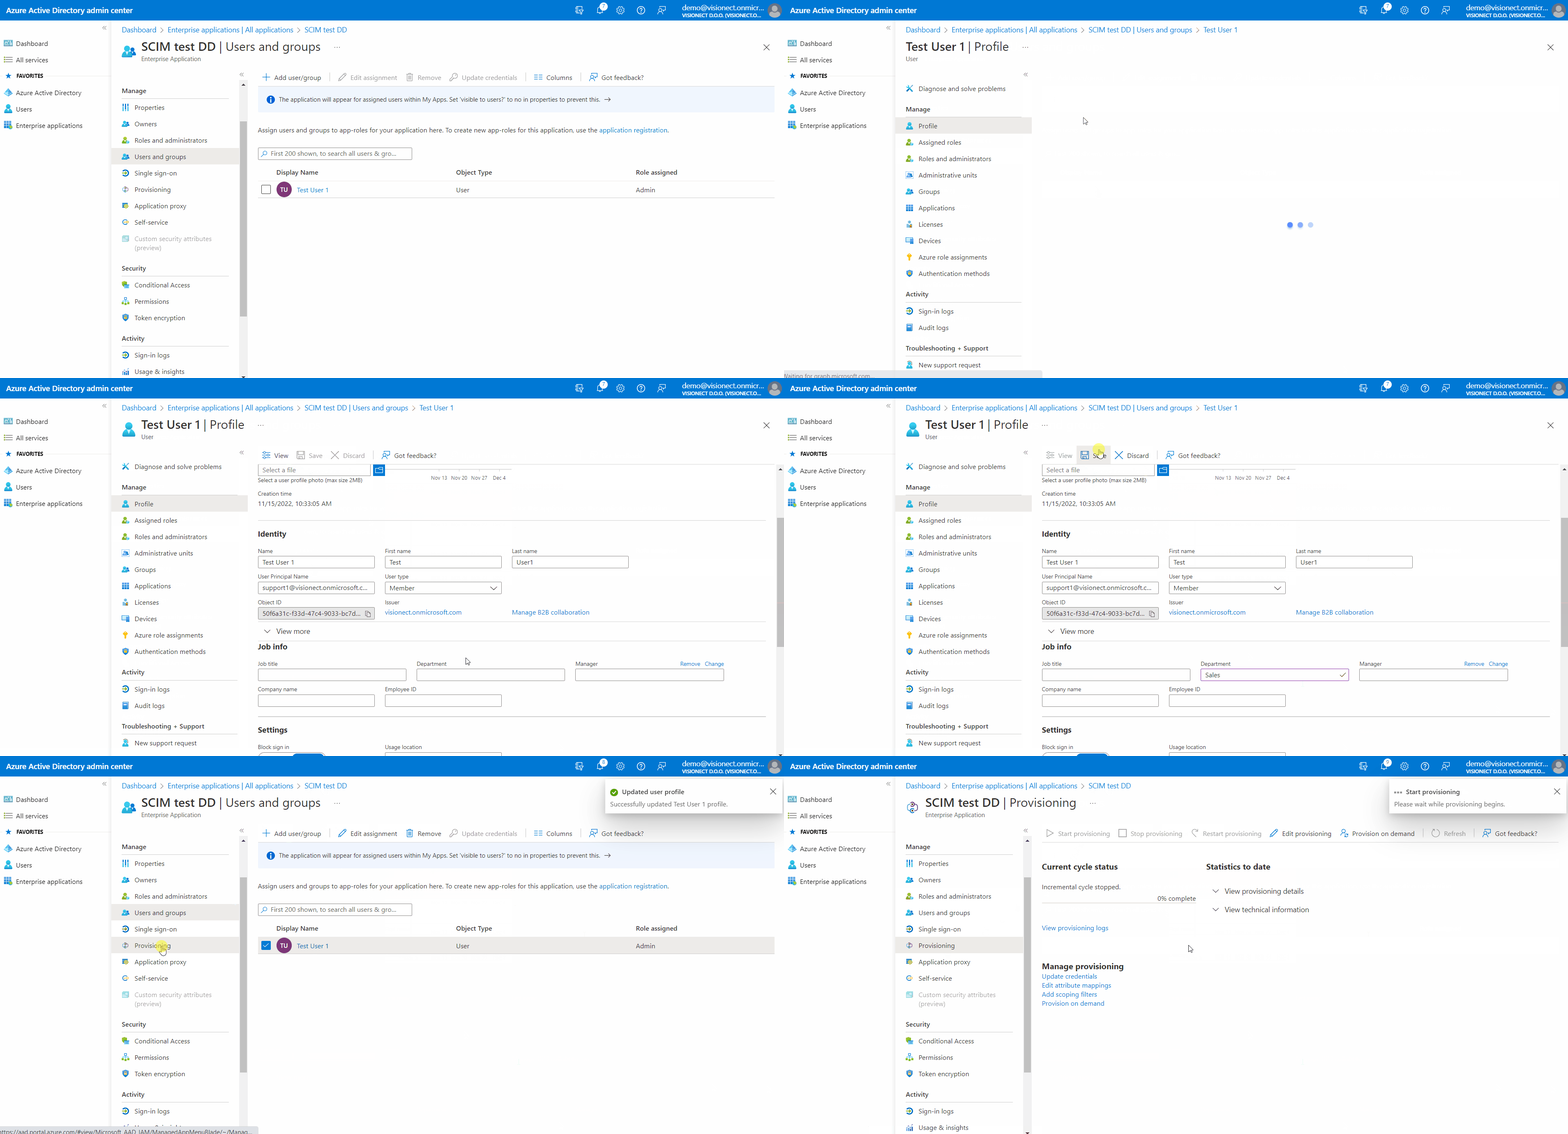
To assign a department to the user please follow the instructions below:
- Navigate to your Joan SCIM AD Azure application
- Once there, go to Users and groups and then click on the user you wish to change
- When the Profile page opens, click on Edit
- Find the Department field in the section Job info and enter the department you wish to add the user to
- Save the configuration
- Once everything is set up, make sure that you start provisioning the users to the Joan Portal. Navigate to "Provisioning" and click "Start provisioning" and that is it!
If you encounter any issues, please contact support@getjoan.com.
