Preparing Microsoft 365 and connecting it with Joan
Microsoft 365 users can prepare Joan for use in 3 easy steps, by:
- Preparing your Microsoft 365 room resources for use
- Connecting Joan to the Microsoft 365 calendar
- Adding your Microsoft 365 calendar rooms
Preparing your Microsoft 365 room resources for use
To successfully pair your Joan device with your Microsoft 365 calendar, it's important to first ensure that your calendar setup is compatible with Joan's functionality.
Begin by verifying that room mailboxes have been created within your Microsoft 365 tenant. If you haven't done this yet, please follow the detailed instructions outlined in the following guide:
How to create a room resource in Office 365
After creating the necessary room resources, you’ll need to modify some of the resource's default properties to ensure that Joan displays your meetings accurately.
By default, Microsoft 365 is configured to show the organizer’s name instead of the actual event title for scheduled events. To resolve this issue and allow Joan to display the correct event details, you’ll need to make changes using Windows PowerShell.
Begin by connecting to Exchange PowerShell:
Connect to Exchange Online PowerShell
Once the admin user is authenticated in Exchange PowerShell, please execute the following command:
Get-MailBox –Identity <roomresource@email> | Set-CalendarProcessing -AddOrganizerToSubject $false -DeleteSubject $false -DeleteComments $false
This will allow Joan to correctly retrieve a meeting’s title and description for every room resource, displaying the correct name for all events scheduled on the room calendar.
**Please note that <roomresource@email> means to enter the email of your room resource, and you will need to do this separately for all of the room resources that you've previously created.
Optional step: Hiding private meetings
In case that you would like to hide the private meetings and not display the meeting information on the Joan tablets, please make sure to execute the following command as well:
Get-MailBox –Identity <roomresource@email> | Set-CalendarProcessing -AddOrganizerToSubject $false -DeleteSubject $false -DeleteComments $false -RemovePrivateProperty $false
Connecting Joan to the Microsoft 365 calendar
After preparing the Microsoft 365 calendar for Joan, log into MyJoan to pair Joan with your calendar.
Go to Settings > Integrations > Calendar, choose Microsoft 365 and login with a user account.
This can be any user account, but for best practice it is recommended to use a service account designated for this purpose (e.g. joan@yourdomain.com).

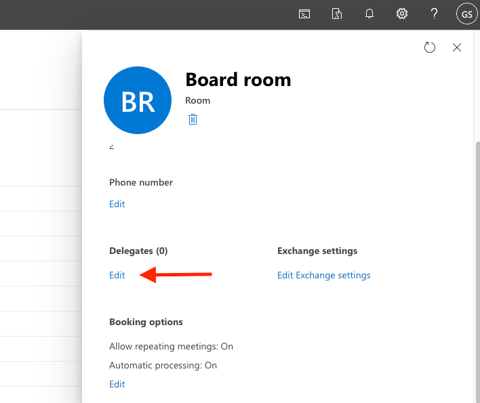
Make sure to add the designated service account mentioned earlier (e.g. joan@yourdomain.com).
**Please note that this service account needs to be a user mailbox, not a shared mailbox, and the user needs to be licensed. Any Microsoft 365 license will do (e.g. Business Basic).
Adding your Microsoft 365 calendar rooms
To start adding your rooms, please go to the room list in MyJoan.
Joan can automatically scan your calendar account to find any available rooms or resources that can be synced with your MyJoan account, using the Autoscan Rooms button.
If the resource does not show up, you might want to add it manually by clicking “Add a room” and inputting the calendar’s email.
If you’re having issues with the above, please contact support@getjoan.com and we’ll help you diagnose the issue.
