- a publicly accessible direct link to MS Exchange - EWS URL (e.g. https://server.com/EWS/Exchange.asmx)
- a username for the delegated user with access rights to room resources you want Joan to manage (domain\username or user@server.com)
- a password for that user
- Windows Servers may have different configurations of the NTLM, Joan application supports NTLMv1 and NTLMv2.
Microsoft Exchange 2010 users:
- Preparing the Microsoft Exchange 2010 calendar for use
- Connecting Joan to the Microsoft Exchange 2010 calendar
- Security and data protection in Exchange 2010
- Joan and Microsoft Exchange working on a public network
Microsoft Exchange 2013 and 2016 users:
- Preparing the Microsoft Exchange 2013 or 2016 calendar for use
- Connecting Joan to the Microsoft Exchange 2013 or 2016 calendar
- Connecting Joan to the Wi-Fi network
- Confirming your settings and connecting a room
Preparing the Microsoft Exchange 2010 calendar for use
Before pairing Joan with your Microsoft Exchange 2010 calendar, you will need to make sure Exchange will support Joan’s functionality. This takes place in five easy steps:
- Check that your system supports the authentication required for Joan to work
- Create a new resource property for each room you want Joan to manage
- Give room access rights to the Exchange user who is going to manage Joan
- Combine the Joan resource properties in a room list
- Edit the room resource properties
Check that your system supports the authentication required for Joan to work
To connect Joan with Microsoft Exchange 2010, you will first need to make sure that your system supports the NTLM proprietary authentication protocol.
The NTLM protocol that Joan requires to work is the protocol that is by default enabled on most Microsoft Exchange servers and allows Joan to connect to an external host without transmitting a user’s password, in a one-way encrypted process.
Create a new resource property for each room you want Joan to manage
To begin using Joan, you will need to be able to create and manage Exchange 2010 mailboxes.
Before connecting Joan to Exchange 2010, log into your Exchange Server with an admin account and open the Exchange Management Console.
Create a new room mailbox for each of the rooms you want Joan to manage. A room mailbox is a resource mailbox that is assigned to a meeting location, such as a conference room.
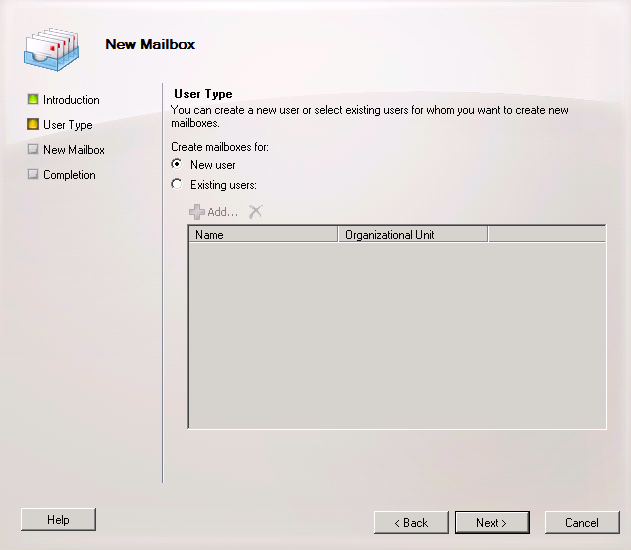
To create a new mailbox for Joan, right-click on "Mailbox" under "Recipient Configuration" and select "New Mailbox." In the pop-up window, in the "Introduction" step, select "Room Mailbox" and click "Next."
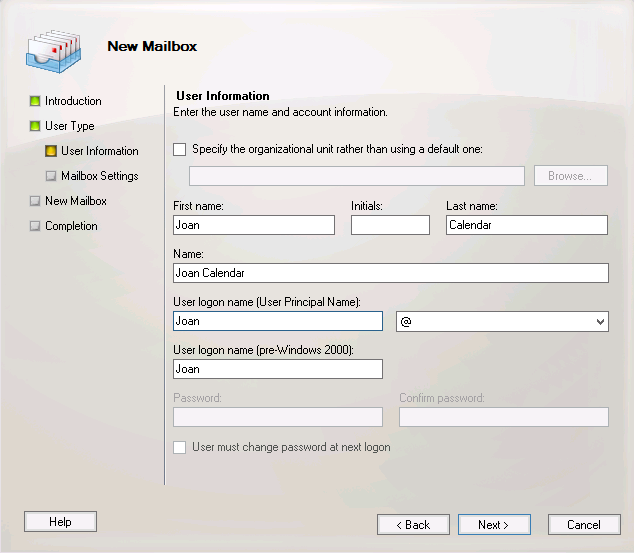
In the next step, under "User Type," select "New User" and enter the username and account information. Confirm your new mailbox settings and complete the process by clicking "Finished."
Repeat the process for all the rooms you want Joan to manage.
Give room access rights to the Exchange user who is going to manage Joan
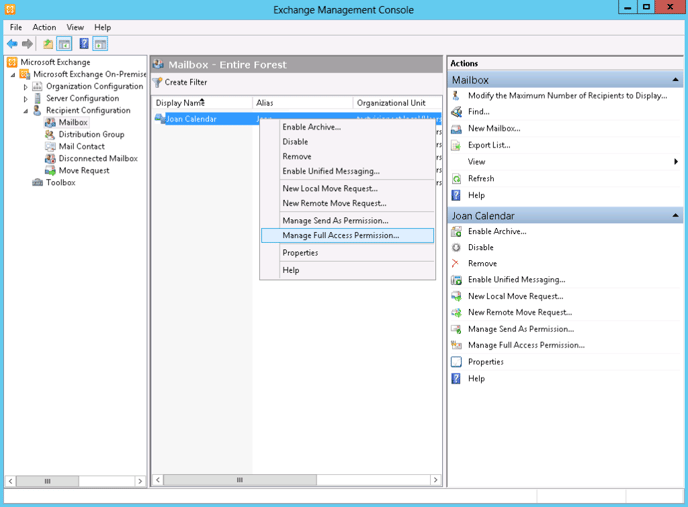
Once your room mailbox has been created, you will need to delegate full access to an Exchange user of your choice. In the Exchange Management Console, find your room mailbox listing and right-click on it, selecting "Manage Full Access Permissions."
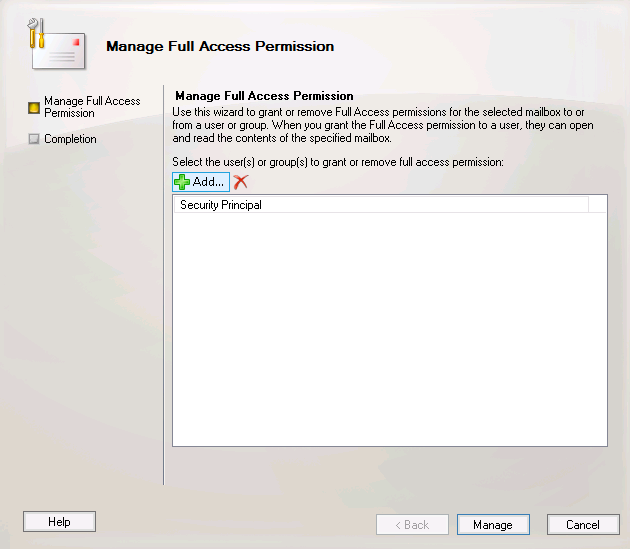
Select "Add" and select the user that is to have full access to the room. While you can use an existing user account to manage Joan, we recommend that you create a separate account beforehand, something like Joan@mailbox.com.
Please note that it may take up to 15 minutes for any changes in access rights to reflect in your calendar.
Repeat this step for all the rooms you want to manage, delegating permission to the same user every time.
Combine the Joan resource properties in a room list
In the final step of preparing your Exchange 2010 calendar for pairing with Joan, bring the newly created Joan resources together in a room list.
Add your Joan rooms to an existing Room list by opening the Exchange Management Console and going to "Active Directory and Users."
Here you will find all of your Room lists; add your new room resource to a particular list by clicking on it and selecting "Properties." You can now add new members, a.k.a. rooms, to the list.
You can also create a new Room list for your Joan resources: log in to your Exchange Server with an administrator account and launch the Exchange Management Shell. To create a new room list, type the following in the Exchange Management Shell:
New-DistributionGroup -Name "Joan Rooms” -RoomList
A new room list will be created.
Edit the room resource properties
Once your Joan room resource has been created, you will need to edit some of the resource’s properties for Joan to display your meetings correctly.
In the Exchange Management Console, find your Joan mailbox listing and right-click on it, selecting "Properties."

In the "Room Properties" pop-up window, edit the following settings to optimize Joan’s functionality. These actions will only affect the meetings created after you have changed the room resource properties.
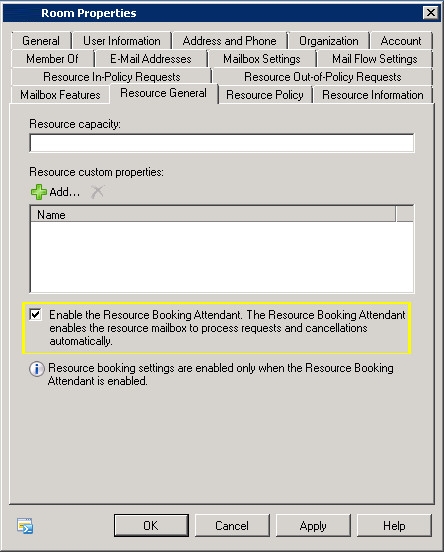
Under "Resource General" make sure that the "Enable the Resource Booking Attendant" is selected. If this option is not checked, the room mailbox will be unable to process booking requests coming from Joan.
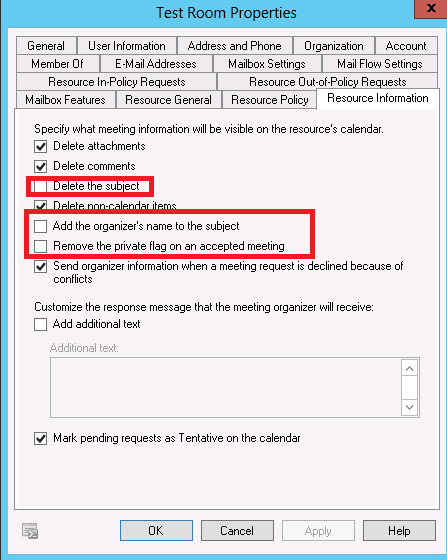
Uncheck the "Delete the subject" box under "Resource Information" to make sure Joan will display your meeting name correctly. Also, uncheck the "Add the organizer name to the subject" box to remove the organizer name from the subject of the meeting.
To make sure that private meeting requests accepted by the resource are not marked as public and the resource schedule cannot be viewed by other people, uncheck the "Remove the private flag on accepted Meeting" box.
Joan relies on a publicly accessible Exchange API, so it should support Microsoft Exchange calendars on public networks without a problem, as long as your security policy allows for external access (ie. Internet access) to your Exchange Web Services.
Joan uses NTLM authentication to connect to Microsoft Exchange.
Preparing the Microsoft Exchange 2013 or 2016 calendar for use
Before pairing Joan with the Microsoft Exchange 2013 or 2016 calendar, you will need to make sure the calendar will support Joan's functionality. This takes place in 5 easy steps:
- Check that your system supports the authentication required for Joan to work
- Create a new resource property for each room you want Joan to manage
- Give room access rights to the Exchange user who is going to manage Joan
- Combine the Joan resource properties in a room list
- Edit the room resource properties
Check that your system supports the authentication required for Joan to work
To connect Joan with Microsoft Exchange 2013 or 2016, you will first need to make sure that your system supports the NTLM proprietary authentication protocol.
The NTLM protocol that Joan requires to work is the protocol that is by default enabled on most Microsoft Exchange servers and allows Joan to connect to an external host without transmitting a user’s password, in a one-way encrypted process.
Create a new resource property for each room you want Joan to manage
To begin using Joan, you will need to be able to create and manage Exchange 2013 or 2016 mailboxes.
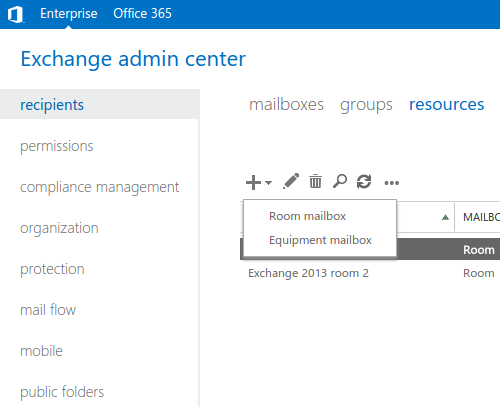
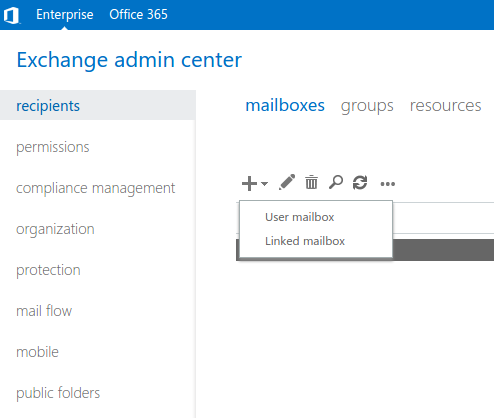
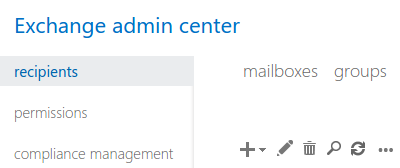
Before connecting Joan to Exchange 2013 or 2016, log into the Exchange Admin Center at https://<your-server>/ecp with your admin account. Click on "recipients" and then select "resources" from the top menu. Then click on the plus sign and select "Room mailbox."
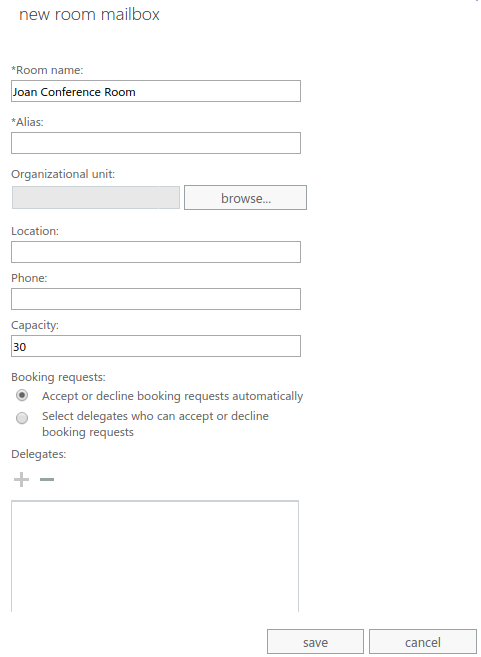
Enter the details of your new room resource and click "Save." Repeat the process for all the rooms you want Joan to manage.
Give room access rights to the Exchange user who is going to manage Joan
Once your room mailbox has been created, you will need to delegate full access to an Exchange user of your choice.
While you can use an existing user account to manage Joan, we recommend that you create a separate account beforehand, something like Joan@mailbox.com. To do so, log into the Exchange Admin Center at https://<your-server>/ecp with your admin account, and select "recipients" from the left menu clicking on the plus sign and selecting "User mailbox."
Enter the details of your new Exchange 2013 or 2016 user and click "save."
Once you have created a user who is going to manage Joan, provide them with access to all of your Joan room resources. Select the room you want to manage in the Exchange admin center and click on the pencil icon to edit its properties. From the pop-up menu, select "mailbox delegation" and give Full Access permission to the user by clicking on the plus sign.
Please note that it may take up to 15 minutes for any changes in access rights to reflect in your calendar.
Combine the Joan resource properties in a room list
In the final step of preparing your Exchange 2013 or 2016 calendar for pairing with Joan, bring the newly created Joan resources together in a room list.
You can also create a new Room list for your Joan resources: log in to your Exchange Server with an administrator account and launch the Exchange Management Shell. To create a new room list, type the following in the Exchange Management shell:
New-DistributionGroup -Name "Joan Rooms” -RoomList
A new room list will be created.
How to add a new room to the room list
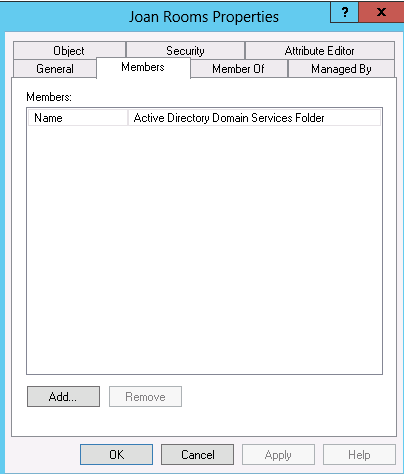
Add your Joan rooms to an existing Room list by opening the Active Directory Users and Computers on the Exchange server. Here you will find all of your Room lists; add your new room resource to a particular list by clicking on it and selecting "Properties." You can now add new members, a.k.a. rooms, to the list.
Edit the room resource properties
Open the Exchange Management Shell and edit the room resource properties. The actions will only affect the meetings created after you have changed the room resource properties. Please also note that these properties can only be changed for one room resource at a time.
Delete the subject to make sure Joan will display your meeting name correctly. Type in:
Set-CalendarProcessing exampleroom -DeleteSubject $False
Add the organizer name to the subject. This will remove the organizer’s name from the subject of the meetings, allowing Joan to display the meeting name correctly. Input:
Set-CalendarProcessing exampleroom -AddOrganizerToSubject $False
Assign a private property to the accepted meeting to make sure that private meeting requests accepted by the resource are not marked as public and the resource schedule cannot be viewed by other people:
Set-CalendarProcessing exampleroom -RemovePrivateProperty $false
Connecting Joan to the Microsoft Exchange 2013 or 2016 calendar
After preparing the Microsoft Exchange 2013 or 2016 calendar for Joan, log into the MyJoan account to pair Joan with your calendar.
Enter your contact and credit card details before proceeding to the next step. At the "Calendar" step, select Microsoft Exchange 2013 or 2016.

After clicking "Next" you will be redirected to the "Pairing" screen, where you will have to enter the user credentials of the user with access rights to the Joan room mailbox.

The password you enter will only be used to authorize Joan's access and is transmitted in an encrypted form.
If you have already connected Microsoft Exchange 2013 or 2016 with Joan and want to change your settings, you can always do so by logging into MyJoan, where you will be able to connect your Joan to a new Exchange mailbox account.
4. Connecting Joan to the Wi-Fi network
Next, MyJoan will lead you through the steps necessary to connect your Joan device to the wireless network you want to use.
Please note that the quality of your Wi-Fi network will significantly influence the performance of Joan. Poor or unstable connections will result in diminished functionality and a poor battery life.
If you’re having issues with your wireless connection, please contact support@getJoan.com and we’ll help you diagnose the issue.
The Wi-Fi is configured with the help of the Joan Configurator, an app available in MyJoan which syncs your wireless network settings with an individual Joan device. Connecting Joan to your Wi-Fi takes place in three easy steps.